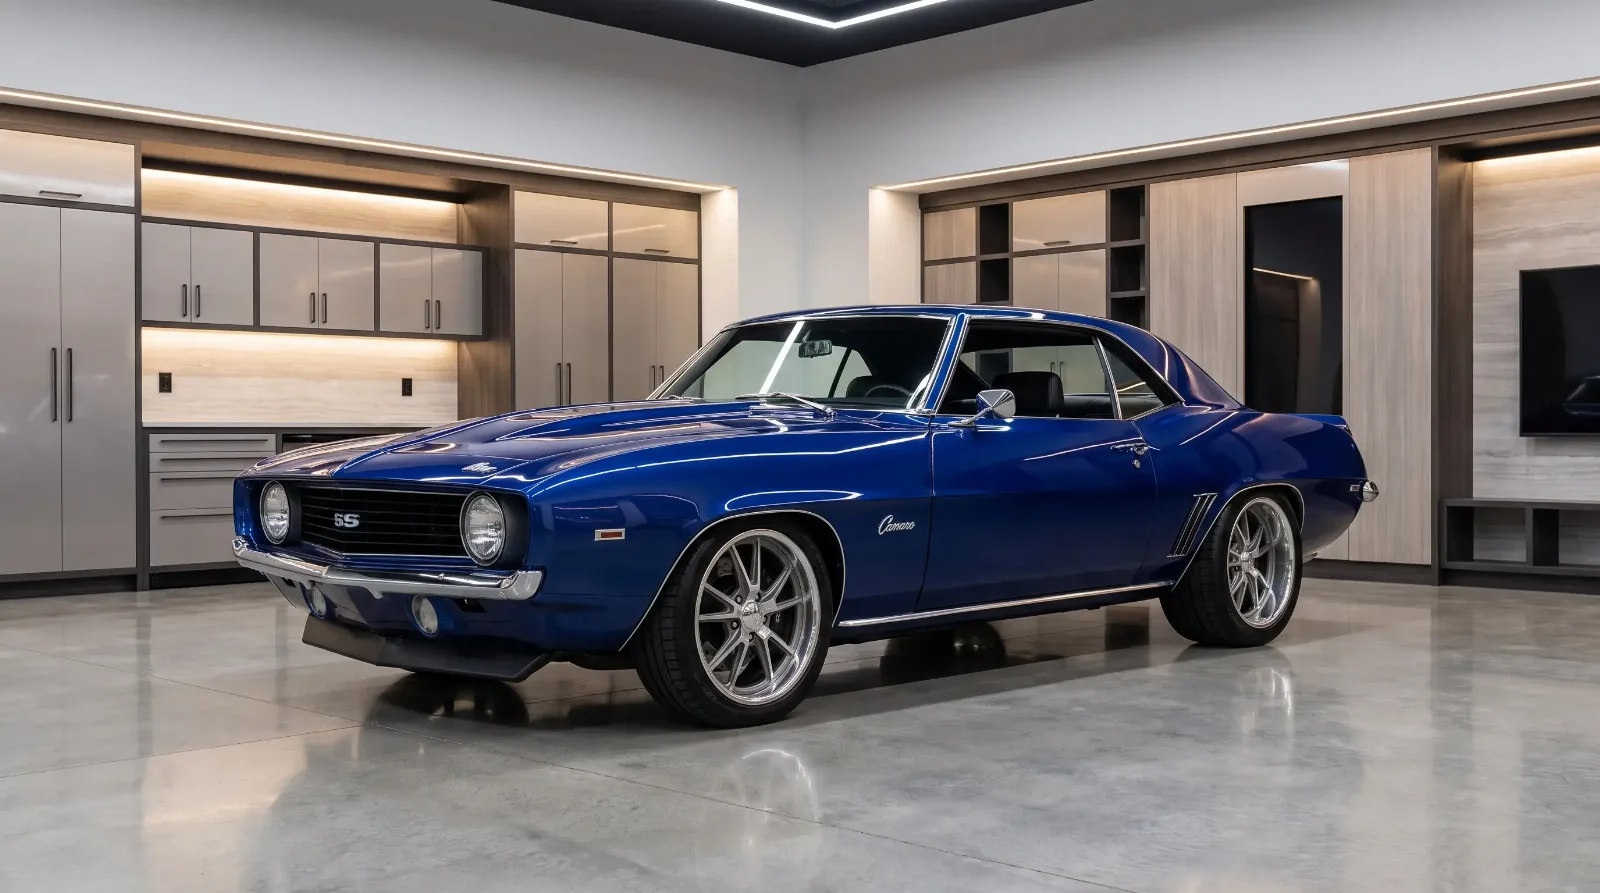


I get asked the same question at every show. Guy walks up, nice first-gen sitting in the driveway back home, wants to know if he should restore it stock or build it. My answer is always the same: depends what you want to do with it. If you want a museum piece, go numbers-matching. If you want to drive the hell out of it, build it. A well-executed camaro restomod is one of the most satisfying machines you can put together in a home shop or commission from a builder. But there are real decisions to make, and a lot of people get them wrong before they spend the first dollar.
To understand why the Camaro became the dominant platform for pro-touring builds, it helps to know where the Camaro story began and what Chevrolet was actually trying to accomplish in 1967. The bones were right from day one: a front subframe, a long hood, a short rear deck, and just enough room for a big-block if you knew what you were doing. Builders have been exploiting that geometry ever since.
What a restomod actually is
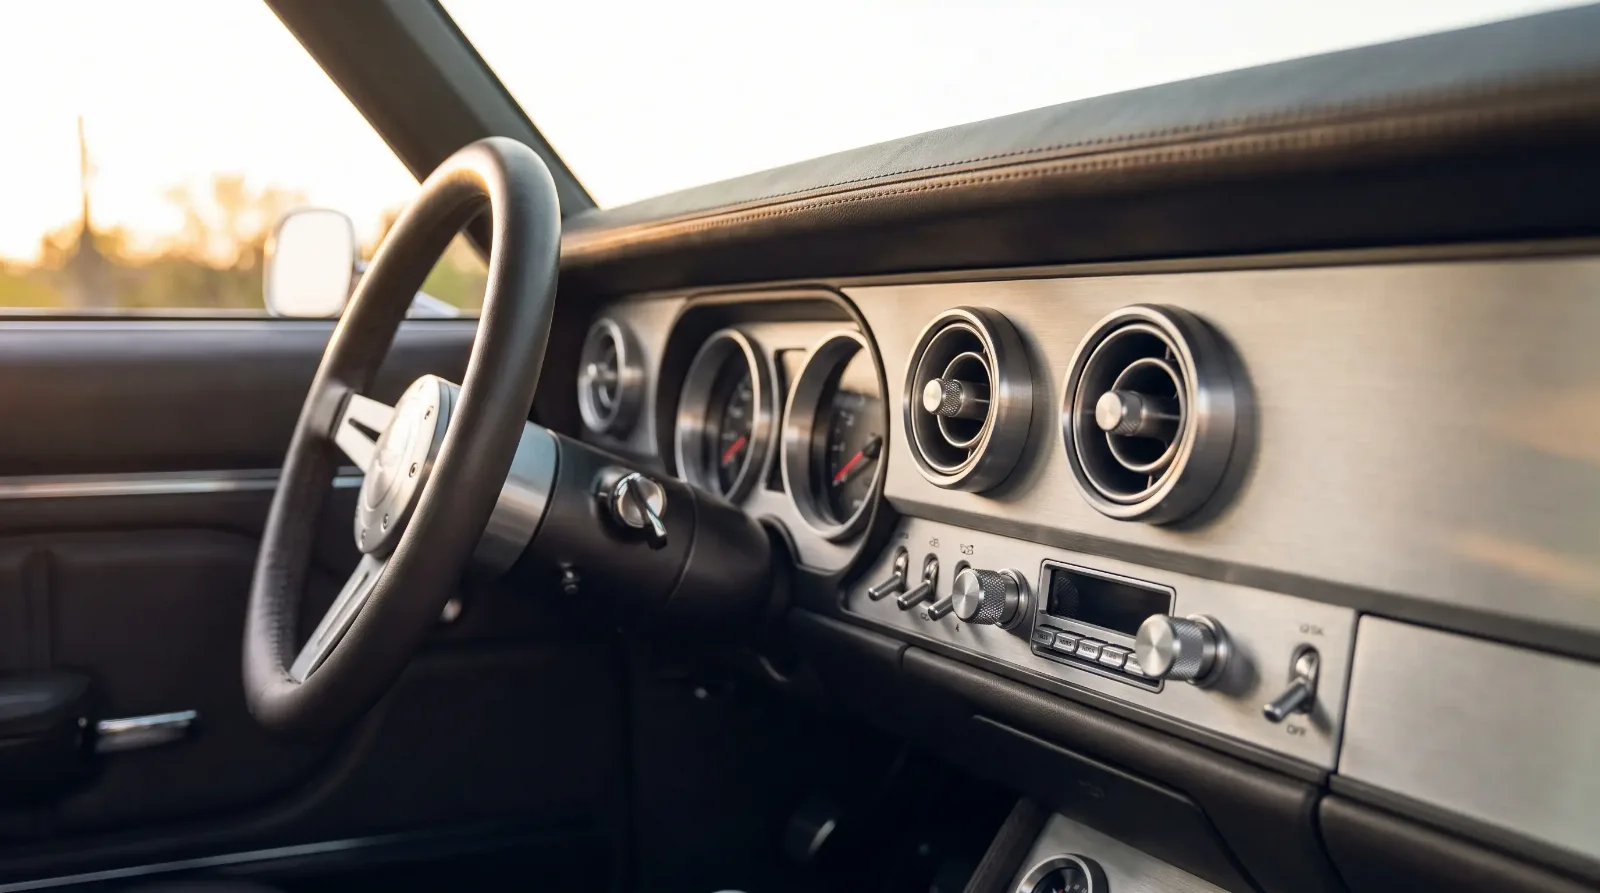
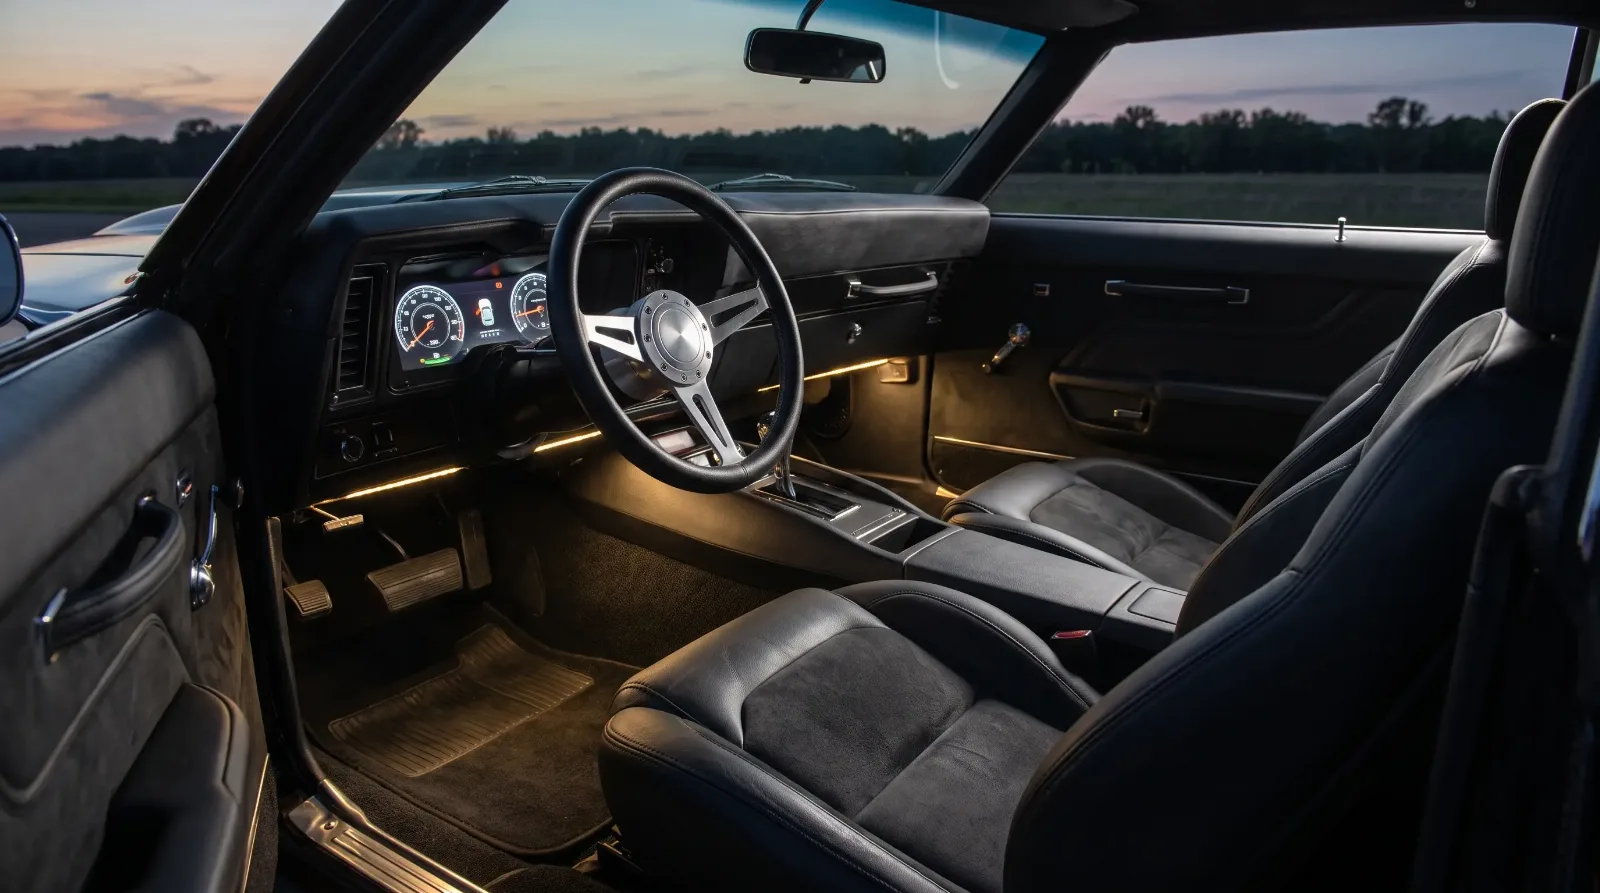
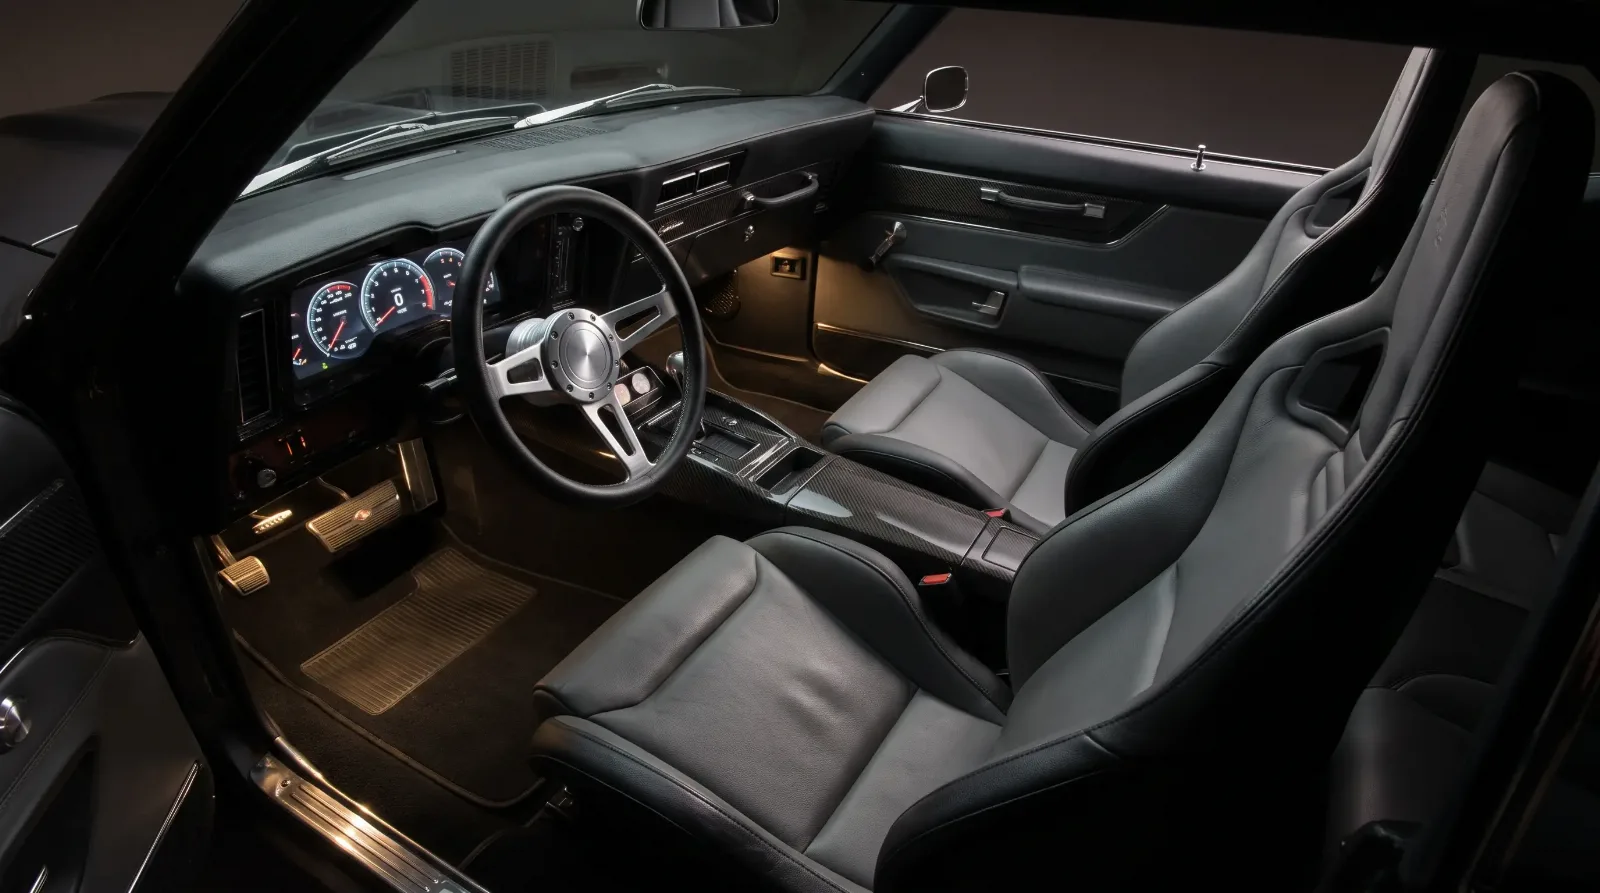
The term gets thrown around loosely, so let me be specific about what it means in practice. A restomod keeps the original body and sheet metal but replaces the running gear with modern components: engine, transmission, suspension, brakes, steering, often the interior. The goal is period-correct appearance with contemporary performance and reliability. You should be able to drive it to a show, park it, and drive home in the dark without worrying about the points ignition or the original Rochester carb flooding in traffic.
Pro-touring is a specific subset. These cars are built for performance driving: autocross, road courses, canyon runs. They tend to have more aggressive suspension tuning, larger wheel and tire packages, and bigger brakes. The appearance is secondary to the function, though most pro-touring builds still look right. Think of restomod as the broad category and pro-touring as the performance-focused end of that spectrum.
What a restomod is not: a car with a spray-can respray and a modern radio. I've seen plenty of those sold as restomods at elevated prices. The legitimate build has documentation, a coherent parts selection, and work that holds up when you get underneath it.
First-gen vs second-gen: choosing your platform
This is the first real decision, and it affects everything downstream. First-gen Camaros run from 1967 through 1969. Second-gen runs from 1970 through 1981. They are not the same car, and they are not interchangeable in terms of aftermarket support, build cost, or the kind of driving experience they deliver.

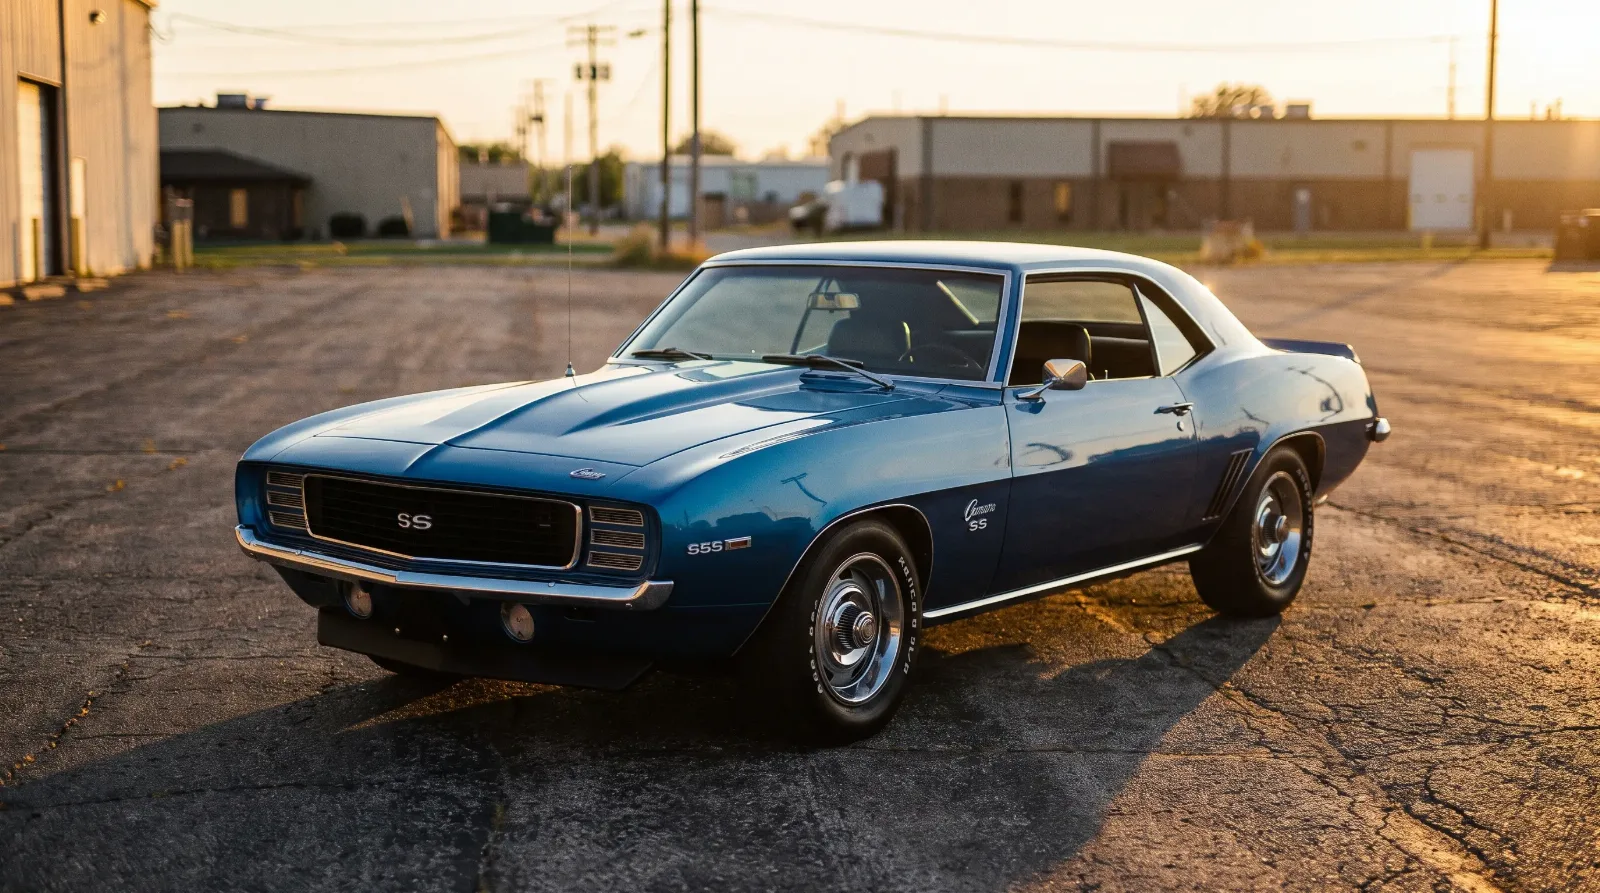
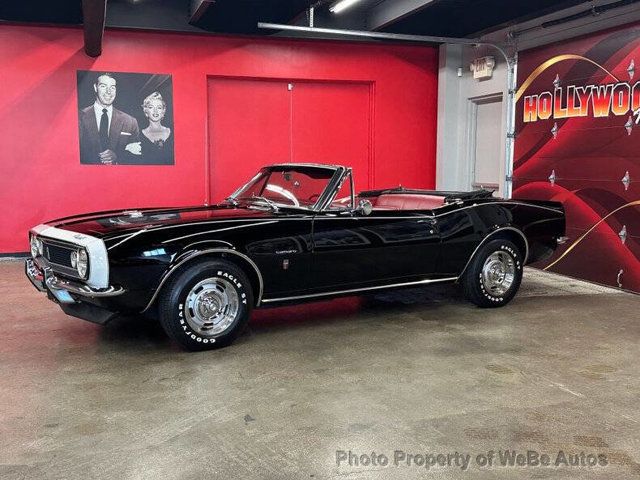
The first-gen, specifically the 1967-1969 cars, has a stronger aftermarket than almost anything else in American muscle. Subframe connectors, full-length frame rails, tubular control arms, rack-and-pinion conversions, big-brake kits, LS engine mounting plates: all of it is off the shelf. Companies like Detroit Speed, Heidts, and QA1 have been refining their first-gen Camaro suspension kits for decades. If you want a straightforward build with predictable results, the first-gen is easier. The 1969 is the most desired and commands the highest prices for clean shells, which matters for your budget math.
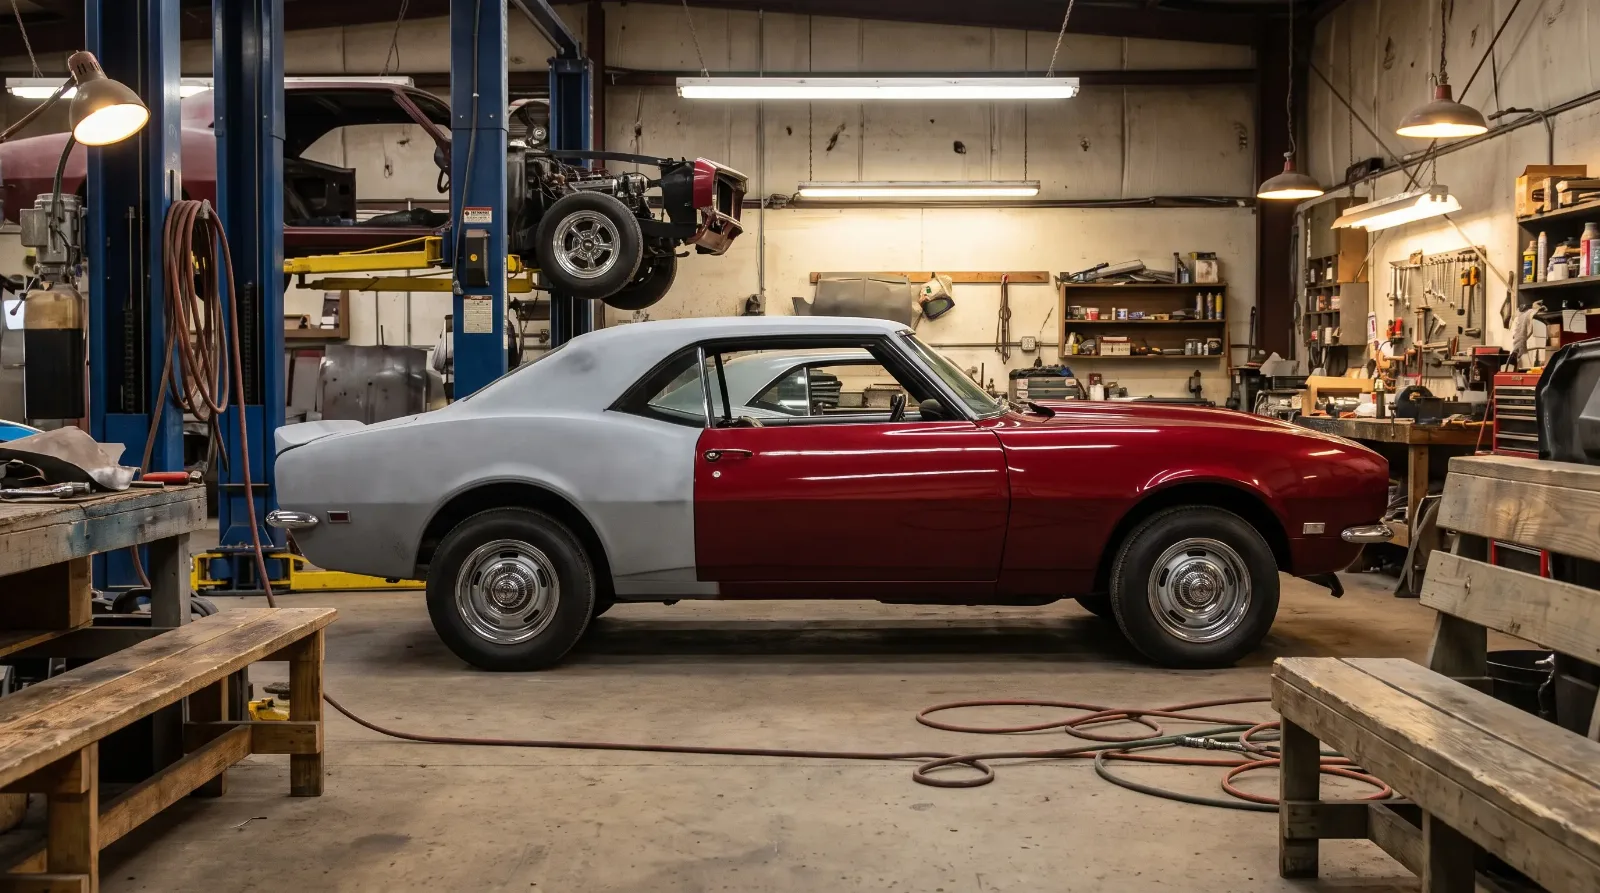
The second-gen, particularly the 1970-1973 cars before the federal bumper regulations changed the nose, has a different following. The body is heavier, the engine bay is wider, and the suspension geometry from the factory was actually better sorted than the first-gen in some respects. Aftermarket support has grown significantly over the past decade. The 1970-1973 cars carry the cleanest lines; the later second-gens, especially the 1974-1981 rubber bumper cars, are the budget entry point for platform cost. You can find a solid 1978 or 1979 shell for a fraction of what a 1969 costs, do the same quality build, and end up with a car that drives just as well.
| Platform | Years | Wheelbase | Aftermarket depth | Shell cost (rough range) |
|---|---|---|---|---|
| First-gen | 1967-1969 | 108 in | Very deep, mature | $15,000-$50,000+ |
| Early second-gen | 1970-1973 | 108 in | Deep, growing | $8,000-$30,000 |
| Late second-gen | 1974-1981 | 108 in | Moderate, improving | $3,000-$15,000 |
One thing that does not get enough attention in platform discussions: rust. California and Southwest cars are a different animal than Midwest or Northeast shells. I've built on both. A clean California shell with surface oxidation and solid floors is worth more than a Midwest car with pretty paint and frame rails you can poke a screwdriver through. Where the car lived its life matters more than the year on the title.
LS and LT engine swaps: what goes in and why
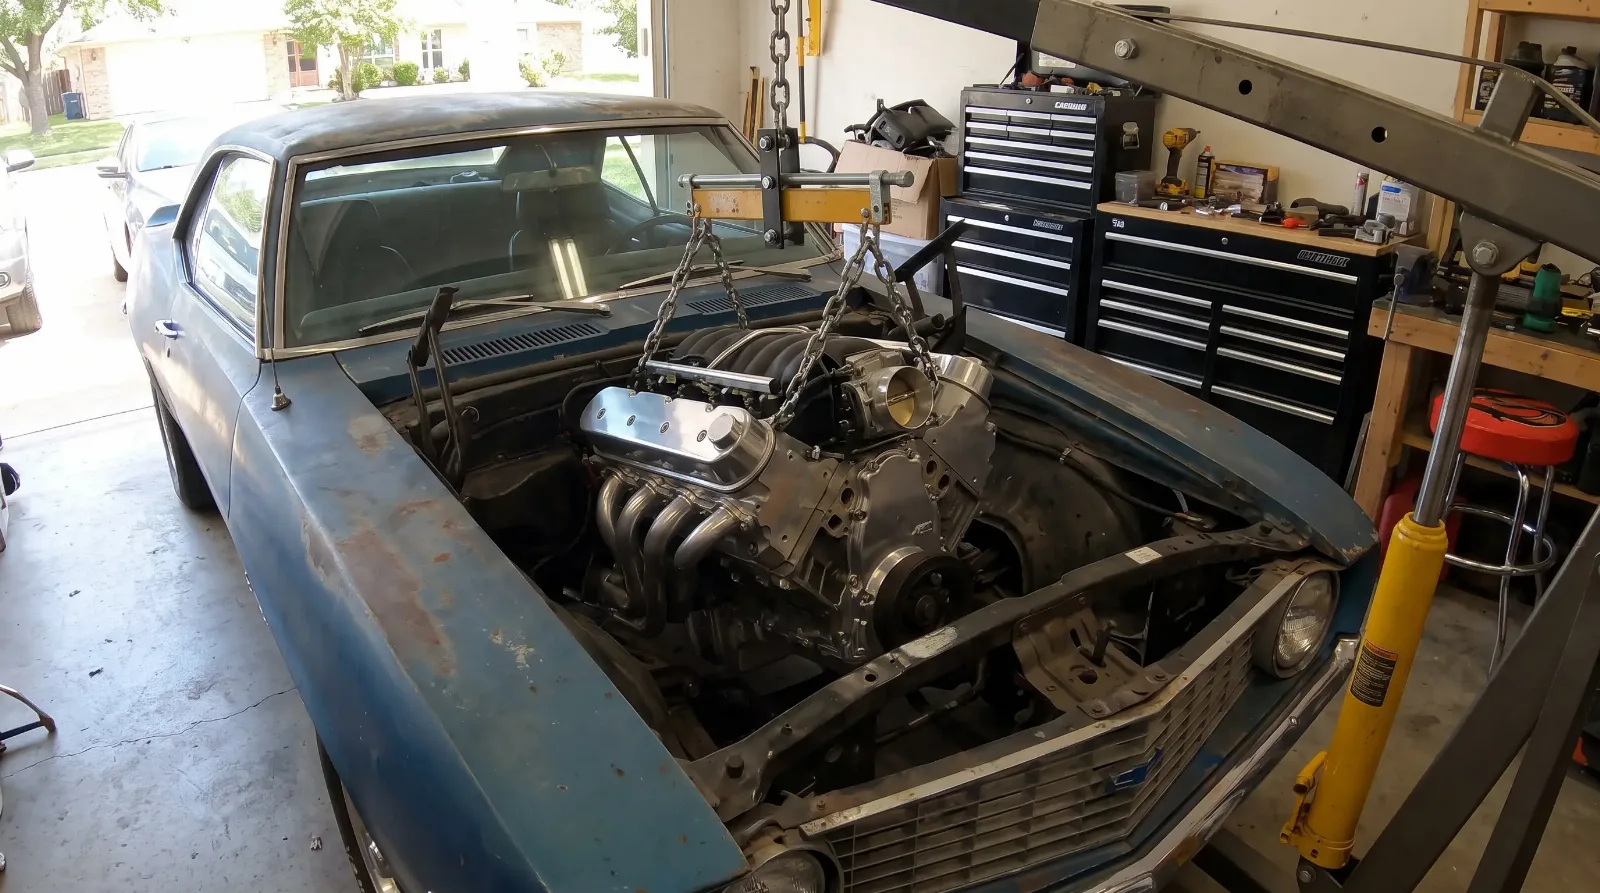
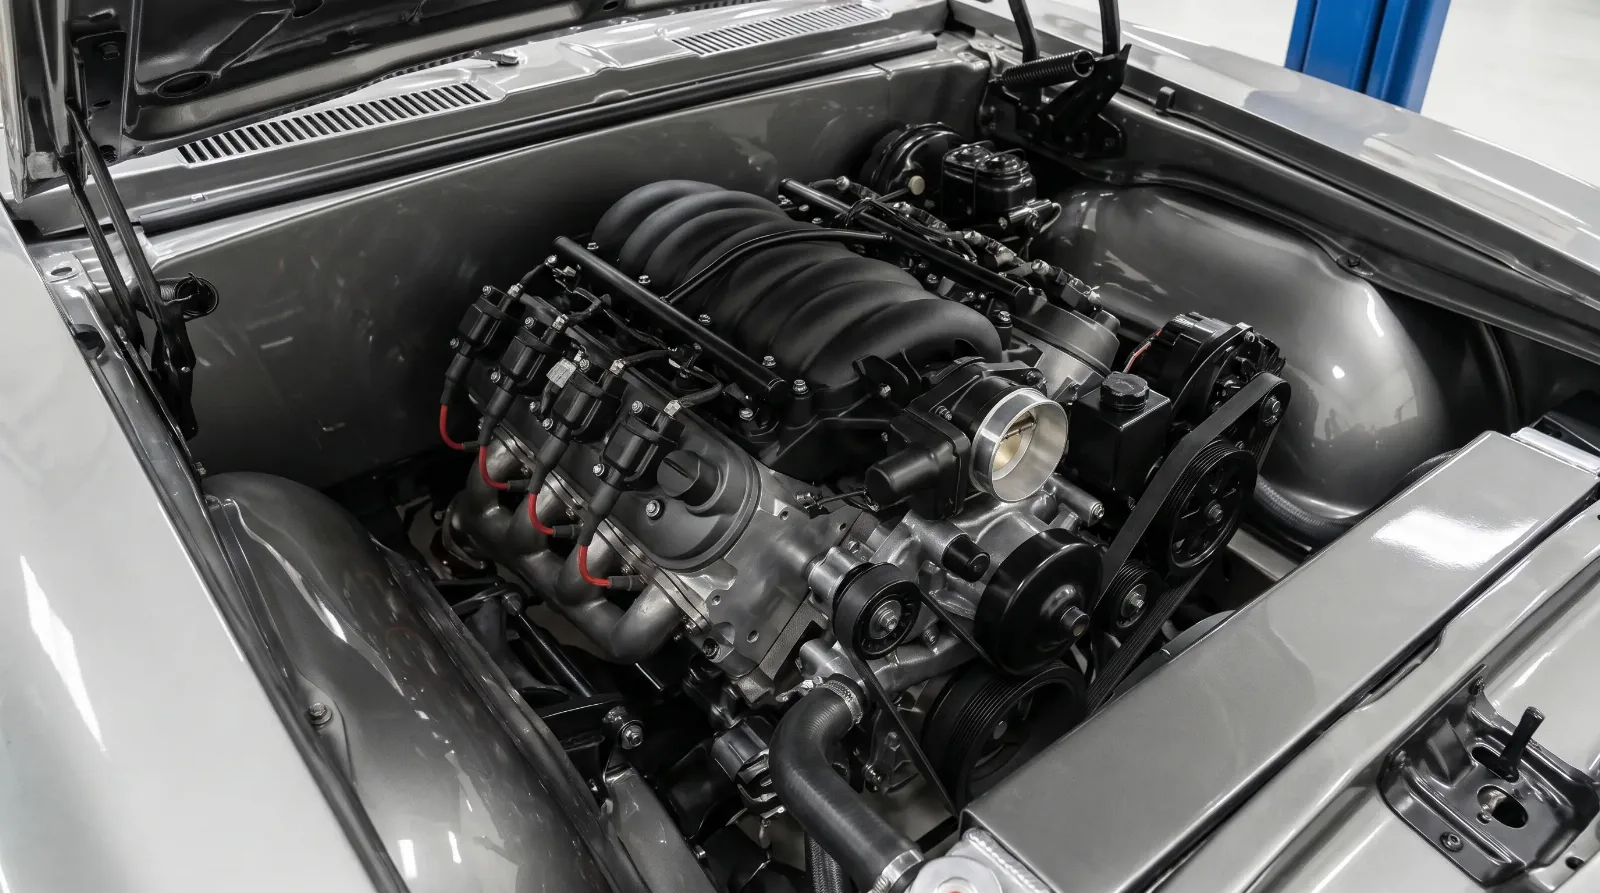
The LS-series engine from General Motors is what happened when an American manufacturer finally figured out how to build a light, compact, powerful, and reliable V8. The LS1 started in the 1997 Corvette and the platform evolved through the LS3, LS7, and LS9 before GM transitioned to the LT family. For Camaro restomod work, these engines are the default choice for most builders, and for good reason.
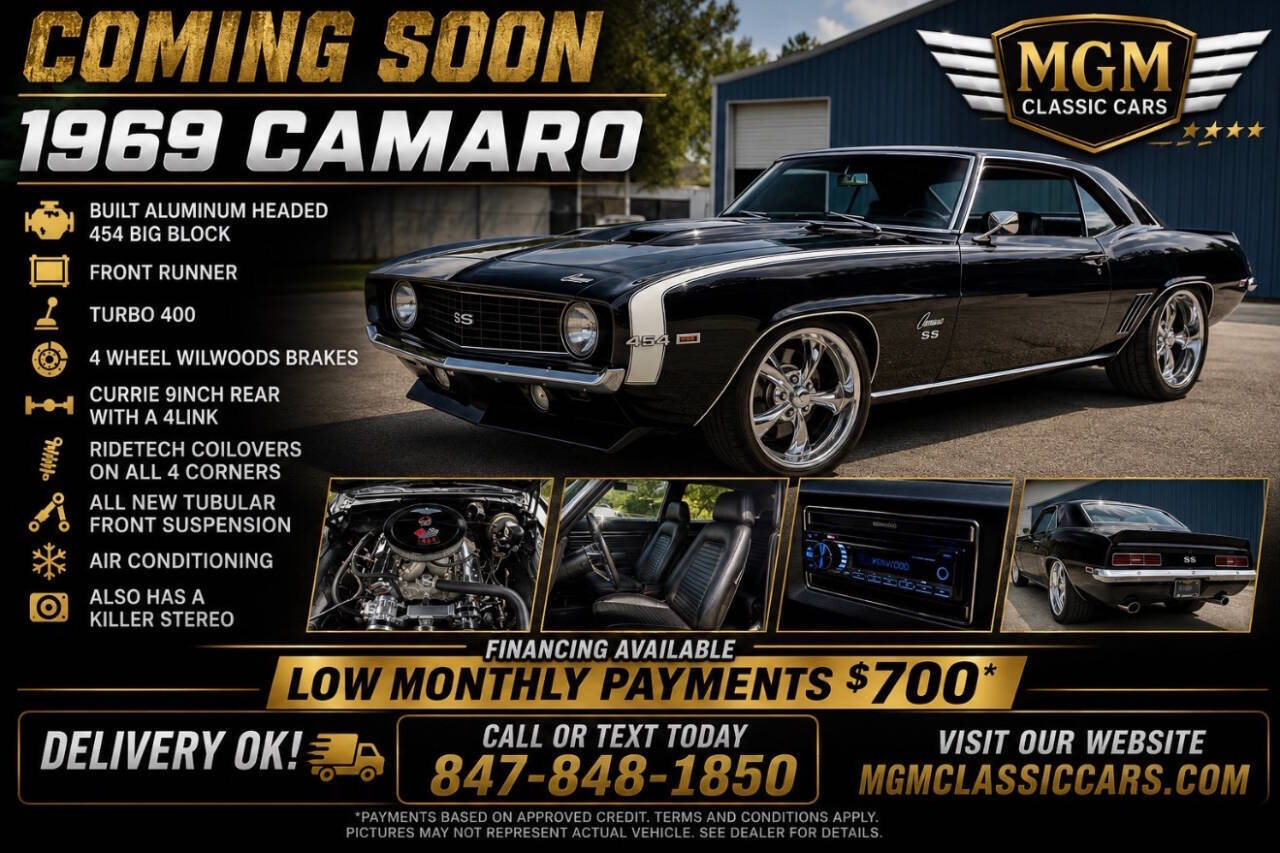
An LS3 from a wrecked 2010-2015 Camaro SS makes around 430 horsepower and bolts into a first-gen Camaro with a swap kit. The engine is smaller than the big-blocks it replaces, which means you gain front-to-rear weight distribution and engine bay room for headers. Fuel injection means it starts cold, idles cleanly, and does not vapor-lock in traffic. Hundreds of thousands of these engines are in salvage yards. Parts are everywhere.
The LS7 is the other common swap. At 505 horsepower, it is a dry-sumped 7.0-liter that was designed for road racing from the factory. The cost is higher, the tuning more demanding, and the packaging tighter because of the dry-sump system. It is the right engine if you are building a serious track car. For a street-driven pro-touring build, the LS3 or an LS3 with a cam and heads gets you most of the way there for less money and less complexity.
The LT1 and LT4 from the Gen V platform are gaining ground as swap candidates. Direct injection and variable valve timing make them more complex to tune and more expensive to install, but the LT4 supercharged version, as used in the C7 Z06, produces around 650 horsepower. If you need that number, you know why. For most builds, an LS-based swap is simpler, cheaper to tune, and supported by a larger ecosystem of aftermarket parts. The LT platform will get there eventually. Right now the LS is still the practical choice for most shops.
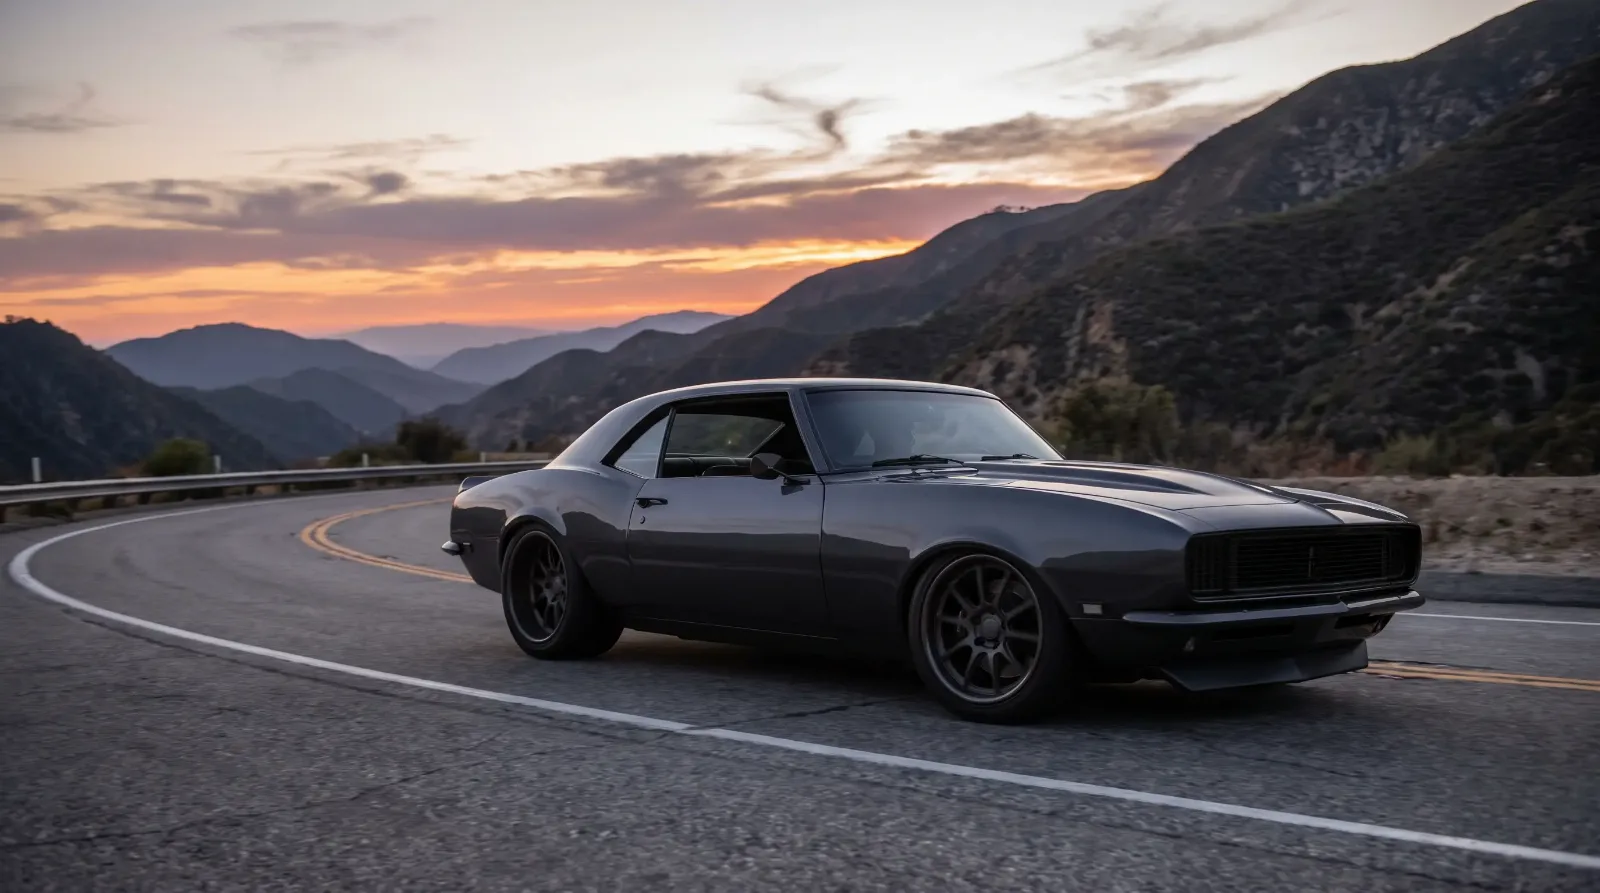
Modern suspension: what actually changes the car
The engine swap gets all the attention. The suspension work is what actually changes how the car drives. Factory first-gen and second-gen Camaro suspension was not bad for 1967 or 1970, but it was designed around bias-ply tires, drum brakes, and power specs that maxed out around 375 horsepower. Put 450 horsepower and modern 305-section radials on original suspension geometry and you have a car that is fast in a straight line and unpredictable everywhere else.
A well sorted restomod turns heads, which the Camaro has always done, on the street and on the screen, in the Camaro in pop culture.
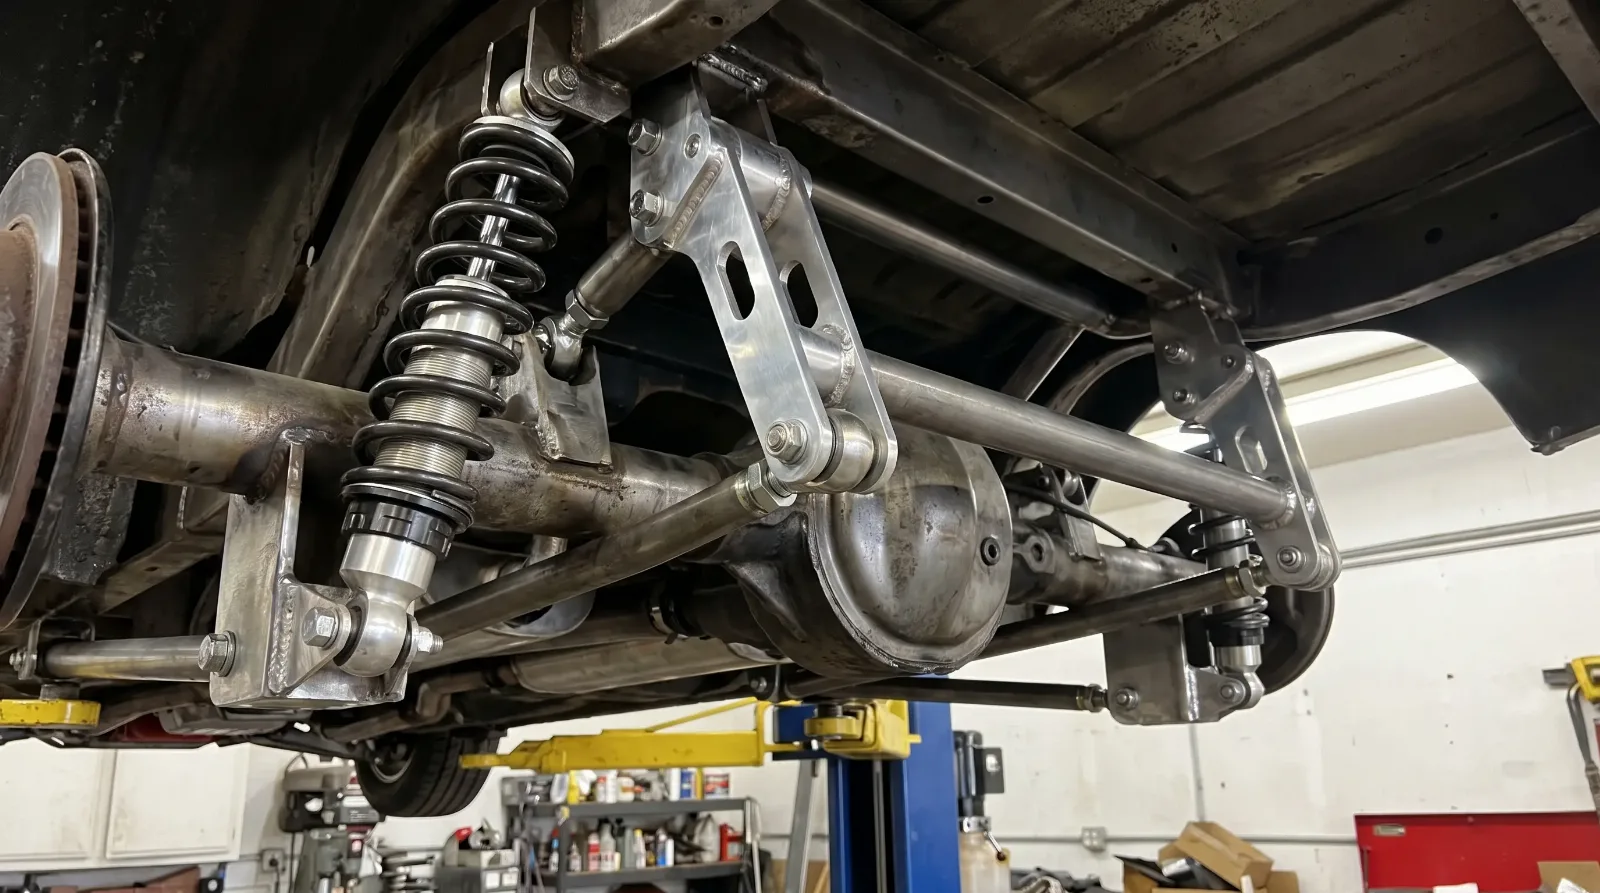
The minimum work for a pro-touring build starts with subframe connectors. These weld or bolt between the front and rear subframes, turning what is effectively a flexible unibody into something with real torsional stiffness. On a first-gen Camaro without connectors, the body flexes enough that doors can bind after hard use. Connectors are cheap relative to the rest of the build and they affect everything else you do downstream.
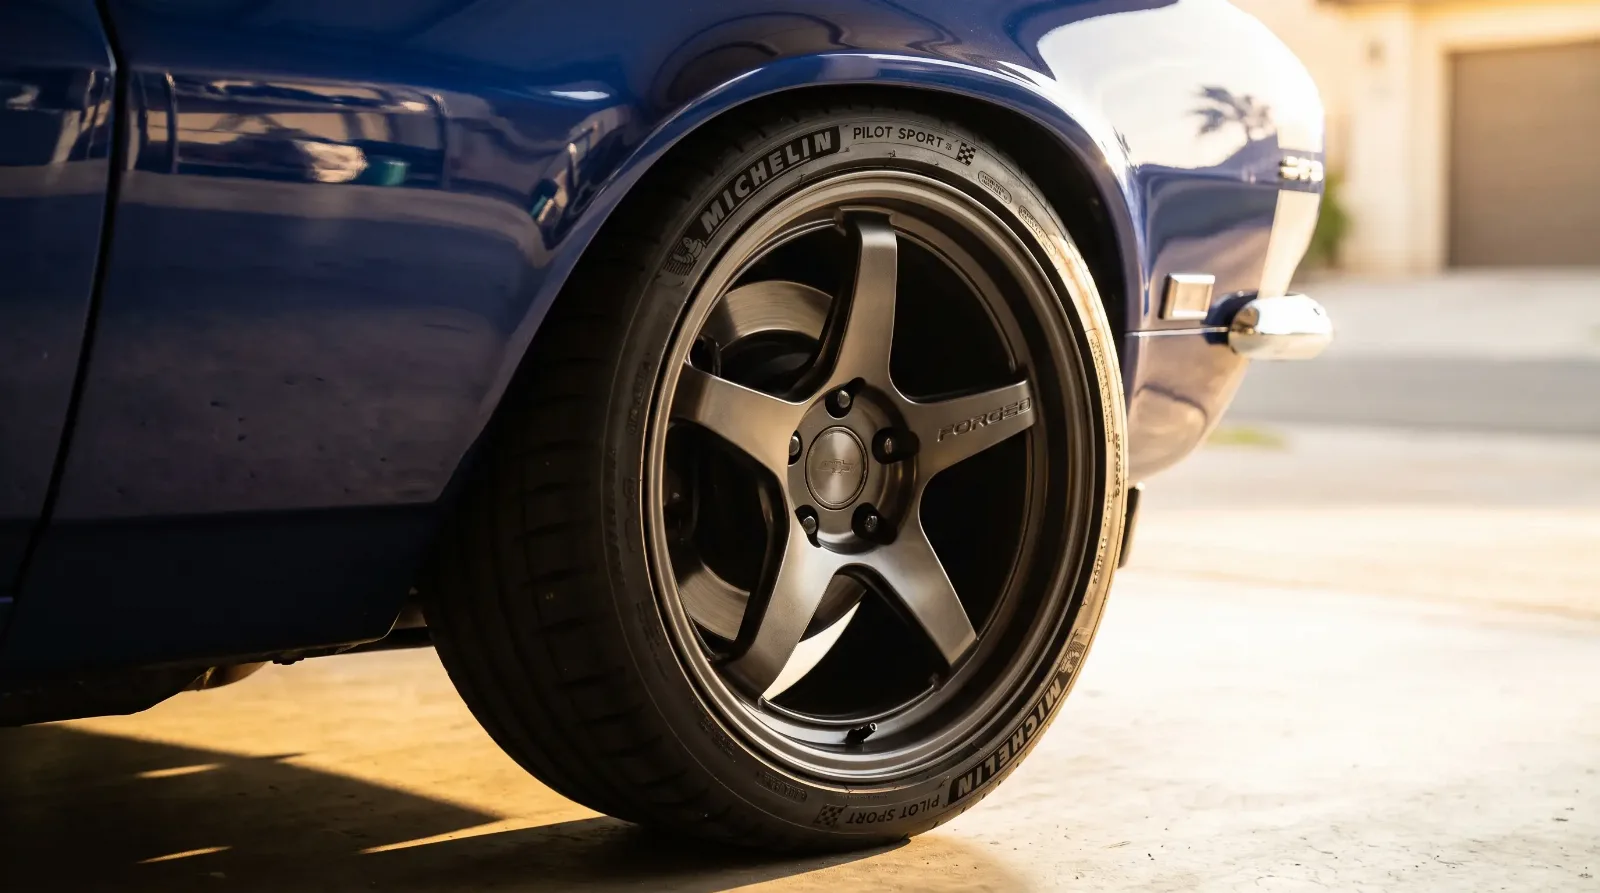
From there: coilover shocks front and rear replace the factory spring-and-shock arrangement with adjustable units that let you dial in ride height and damping. Companies like QA1, Viking, and JRi all have Camaro-specific coilover kits at different price points. The difference between a $1,200 kit and a $4,000 kit is real, particularly in adjustability and valving quality. If you are building a track car, spend the money on suspension before you spend it on power.
Tubular control arms replace the factory stamped-steel pieces with geometry that actually works with modern tires. Most tubular setups also relocate the control arm pickup points to improve camber curves through suspension travel. On a first-gen, this is one of the single most impactful changes you can make to how the car handles at the limit.
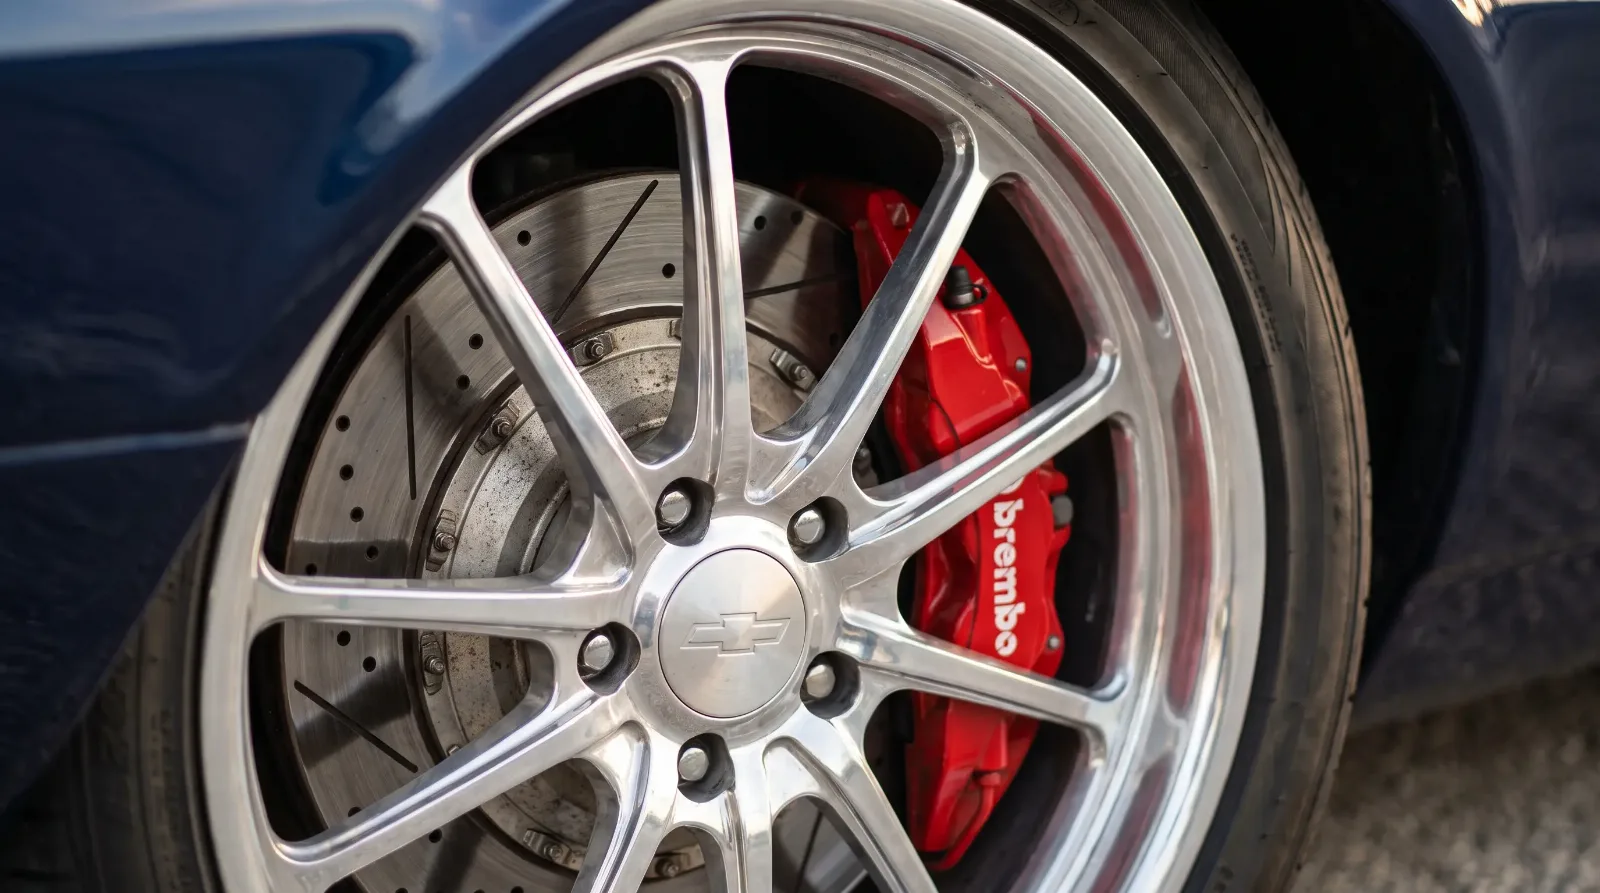
Big brakes are the last piece. Factory drum brakes stop a 3,400-pound car from 60 mph acceptably once. They do not stop it repeatedly. A Wilwood or Baer four-piston setup with 12-inch-plus rotors front and rear gives you actual fade resistance and consistent pedal feel. Plan for 13-inch rotors minimum on a car that will see any track use. The wheel choice then has to accommodate the caliper clearance, which is why 17-inch minimum wheel diameter is standard on serious builds.
🔧 Inspection Priorities
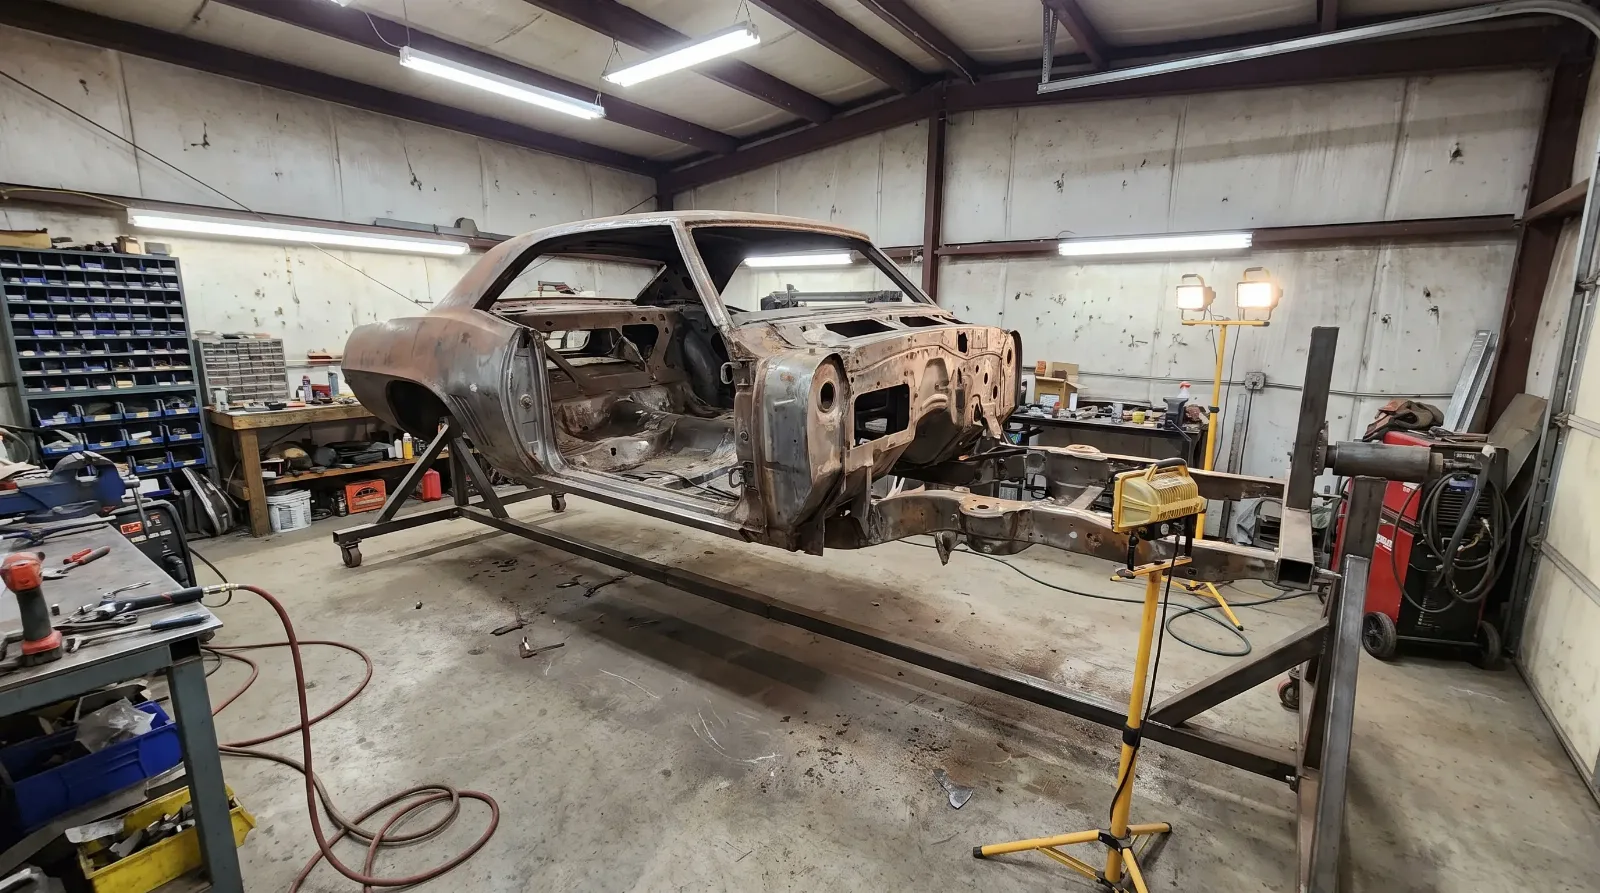
- Subframe and frame rail condition. On a used restomod or a shell you are evaluating, get under the car with a light and a pick. Rotted frame rails on a first-gen Camaro can cost several thousand dollars in fabrication time before you have done anything else. Do not assume a clean floor means clean rails.
- Firewall and torque box integrity. The torque boxes at the rear of the front subframe take enormous stress loads. Cracks here require welding and reinforcement before any suspension upgrade is worth doing.
- Engine swap documentation. On a pre-built restomod, ask for the swap kit brand, the tune file, and the shop that did the work. An undocumented LS swap with an unknown tune is a liability, not an asset.
- Suspension alignment and geometry setup. Coilovers mean nothing if the alignment was never dialed in. Ask for an alignment sheet. If the seller does not have one, factor that into the price.
- Brake system integrity. Big brake kits only work if the master cylinder, proportioning valve, and lines match the setup. Mismatched brake components cause pedal feel issues that can be dangerous and expensive to sort out.
The restomod vs stock restoration debate
I am not neutral on this. I think a well-built restomod is more interesting than a concours-correct stock restoration of the same car, and I think it is also more honest about what these cars actually are. A 1969 Camaro Z/28 that has been restored to factory spec is a wonderful thing, but it does not drive the way people imagine it does. The original 302 small-block made around 290 horsepower. The suspension was period-correct. The brakes were adequate. The car was impressive for 1969 and is a museum piece in 2026.
A restomod on the same platform, built with care and a coherent vision, drives the way the legend says it should. That is the honest argument for building over restoring: you are not trying to preserve what was, you are building what could have been if the engineers had had access to 50 more years of development.
The counterargument matters too. A correct numbers-matching first-gen Camaro holds value differently than a restomod. The collector market for documented, unmodified cars has its own logic. If you buy a clean 1969 SS and build it into a restomod, you have converted a numbers-matching car into a modified one, and you will not get numbers-matching money for it when you sell. This is a real financial consideration. If the car you start with has matching numbers and original drivetrain, think carefully before you pull the engine. If it is a solid shell with a tired replacement motor and a patched interior, build it without guilt.
If you want to see what direction the market is going, Camaro restomods for sale on the current listings reflect real transacted prices and help you understand what a finished build actually brings versus what a stock car commands. The spread is real, and it varies by quality of execution.
For anyone considering the alternative path, the demands of a stock restoration are worth understanding fully before you commit either direction. A proper stock restoration on a first-gen Camaro is not cheaper than a restomod. In many cases it is more expensive, because correct parts cost more than performance parts and the margin for error is smaller.
"Vision matters more than parts list. I've seen $80,000 builds that drove wrong because nobody thought about what the car was supposed to be before they started ordering components. And I've seen $30,000 builds that were right because the builder had a clear idea and executed it without second-guessing every decision. Know what you want the car to do before you spend the first dollar."
— Jim Vasquez
What these builds cost
Nobody wants to say a number here, and I understand why: the range is enormous. But vague answers do not help anyone budget a build, so here is a realistic breakdown.
A starting shell for a first-gen Camaro in driveable but worn condition will run well into five figures in most markets, more for a clean 1969, less for a 1967 or 1968 with some rust that you plan to address. A second-gen shell in comparable condition will run meaningfully less, more for a clean 1970-1972.
The LS3 swap with a quality mount kit, headers, exhaust, fuel system, and a proper tune is a five-figure parts expense if you are doing the labor yourself, more if you are paying a shop. The suspension package, front and rear coilovers, tubular control arms, subframe connectors, and a rack-and-pinion conversion, is several thousand more in parts. Big brakes and a serious wheel-and-tire setup each add a few thousand dollars.
Add body and paint work, interior, wiring, and the incidental costs that every build generates, and a well-executed first-gen Camaro restomod typically lands in the high five figures to low six figures by the time it is finished if you are doing it right. Shops in Southern California or Nashville charge more. A builder who does his own labor in a home shop can do it for less. There is no version of this car done correctly that comes in at a bargain-basement, low-five-figure all-in number. Anyone telling you otherwise is leaving things out.
Finding the right builder or doing it yourself
The Camaro restomod world has no shortage of builders, from one-man shops in rural areas to high-profile outfits that build for major SEMA shows. The difference in quality and approach is significant. A shop that does five builds a year and has been doing it for fifteen years is different from a shop that does fifty and has a production line mentality. Neither is automatically right or wrong, but you need to know what you are buying.
Questions to ask any builder: Can I see three finished builds from the last two years and talk to the owners? What suspension kit do you use and why? Do you do the alignment in-house or send it out? Who tunes the engine and can I see a sample dyno sheet? What is your warranty on the drivetrain work? These are not hostile questions. A serious builder will have answers for all of them. If the response is vague or defensive, keep looking.
The home builder path is viable if you have the skills, the tools, and the time. Most of the swap kits are designed to be installed without specialized equipment. Detroit Speed's subframe kits for first-gen Camaros come with detailed instructions and phone support. Holley and Edelbrock both offer LS swap kits with EFI systems designed for exactly this application. You can build a serious pro-touring Camaro in a two-car garage if you are methodical about it. The build will take longer than you think and cost more than you budget. That is true of every build I have ever been involved with, including my own.
Sources and notes
Production figures, engine specifications, codes, and dates in this article are cross-referenced from established Camaro references, period documentation, and owner registries. Where sources differ, the most commonly cited value is used. Cost figures are indicative and vary by supplier, region, and condition.
- Chevrolet Performance LS3 6.2L 430HP Crate Engine (PN 19435098)
- General Motors LS-based small-block engine (LS1/LS3/LS7 specs)
- Detroit Speed - First-Gen Camaro Suspension Systems
- Wilwood Disc Brakes - Camaro Big Brake Kits
- Pro-Touring.com - First-Gen Camaro Build Reference
- TREMEC T-56 Magnum Transmission Specifications